Although this presentation is in the form of a tutorial, it is not interactive. Do not attempt to follow the keying instructions that are given. Navigation within the presentation is possible only with the navigation bar at the bottom of each page.
Output Screen 1
Good Stuff wants the GOODEMP job output to a text file with fields appearing in the following configuration:
| Field | Columns |
|---|---|
| Employee Number | 1-2 |
| SS# | 4-14 |
| Hourly Rate | 16-19 |
| Name | 21-40 |
| Address | 42-61 |
| Phone | 63-75 |
Notice that the good folks at Good Stuff want the output in an order different from the keying order. To begin the output process, we return to the Check Box Edit utility to tell Unibase which columns each field will occupy. (This could have been done during the initial field attribute definition process.)
Output Screen 2
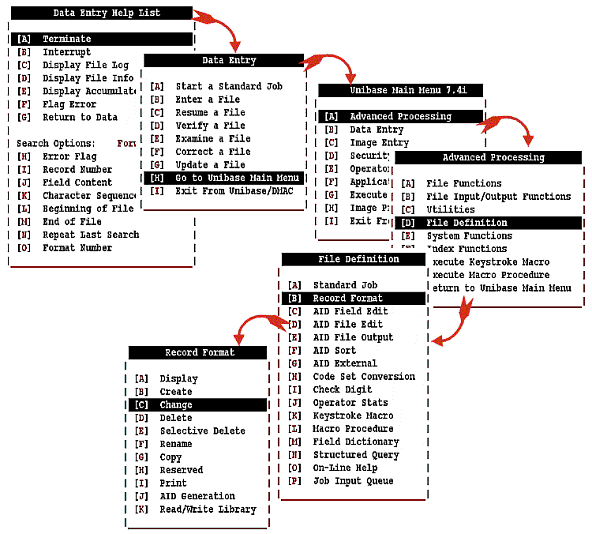
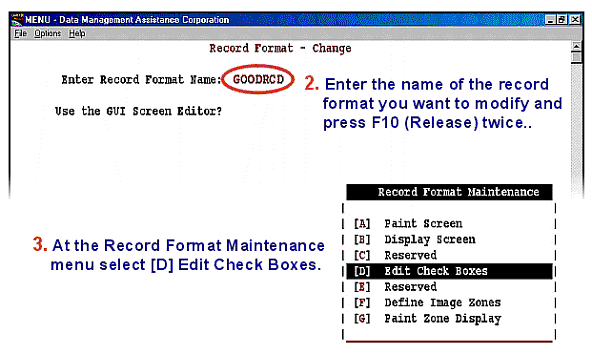
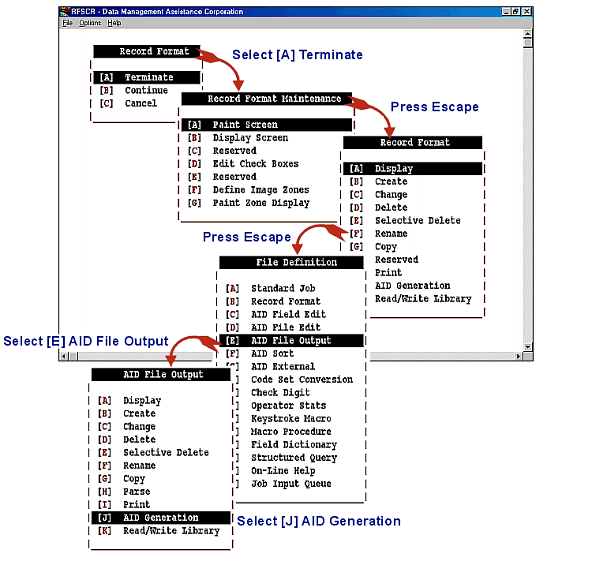
1. After Escaping from data entry, proceed through the indicated menu choices until you arrive at the screen asking for the name of the record format you want to change.
Output Screen 3
Output Screen 4
Output Screen 5
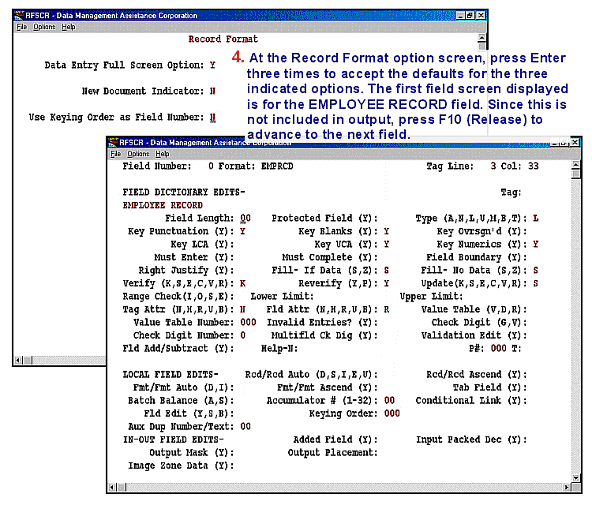
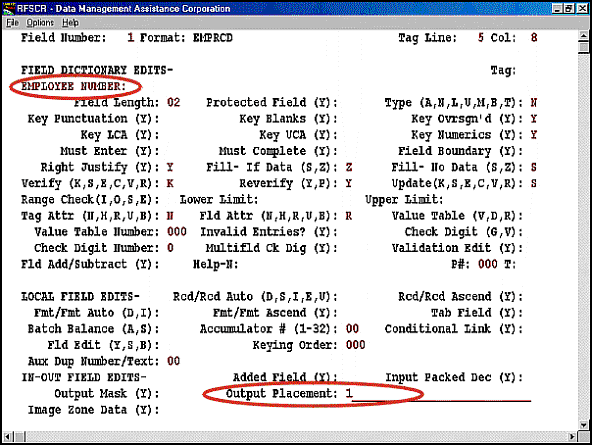
5. Data from the EMPLOYEE NUMBER field is to be output to columns 1-2, so advance to the Output Placement option at the bottom of the page and enter “1”. Press F10 (Release) to continue to the next field.
Output Screen 6
6. For each field enter the appropriate beginning column number. When you press F10 (Release) after completing the last field, you will be returned to the Record Format menu.
Output Screen 7
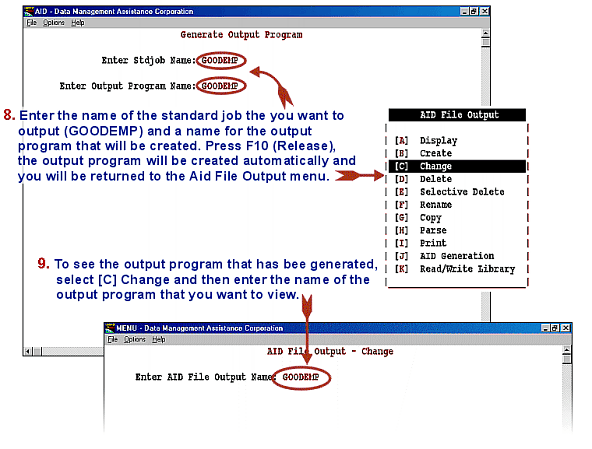
7. The next step is to generate an output program using the Unibase Output Generator.

Output Screen 8
Output Screen 9
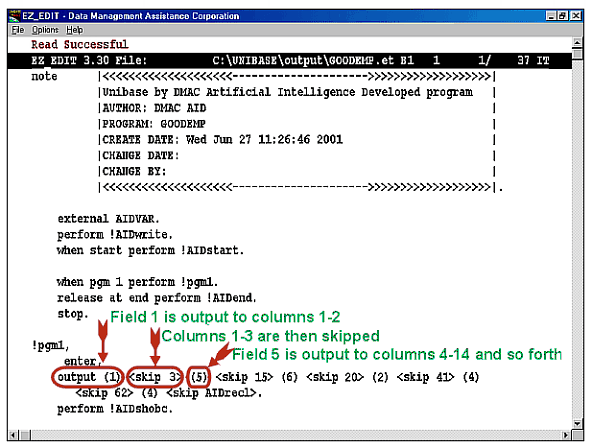
This is page one of your GOODEMP output program. This program has only two pages, but more complex output programs can run to many pages. The program has been opened in Unibase by DMAC’s built-in text editor, EZ- Edit. This enables you to edit or extend the program once you are familiar with AID language programming. It is not necessary to open the output program in EZ- Edit in order to generate output.
Now that you have examined the GOODEMP output program, we’ll proceed with the steps necessary to generate output with the program. EZ-Edit is exited by pressing F-10 (Release) and then X.
Output Screen 10
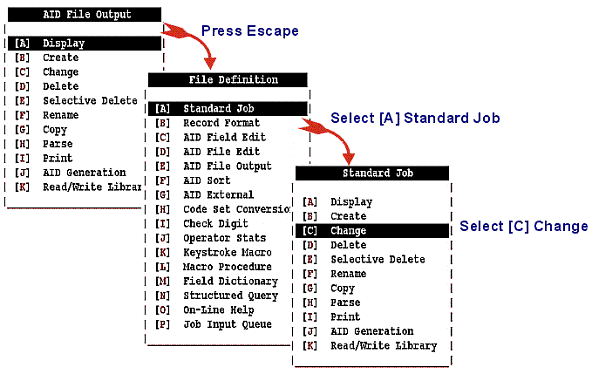
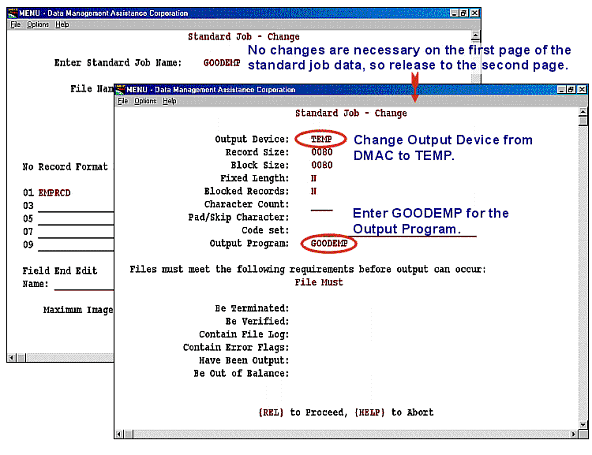
10. Your next task is to modify the GOODEMP standard job data so that Unibase knows which device to use and the name of the output program. After exiting the EZ-Edit program you will return to the Aid File Output menu. Follow the indicated steps to access the standard job data pages.
Output Screen 11
After making the changes, press F-10 (Release) to continue.
Output Screen 12
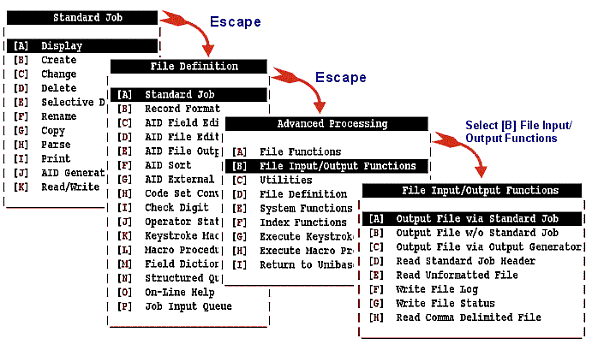
11. Now that Unibase knows which device and output program to use, it’s time to generate the output.
Output Screen 13
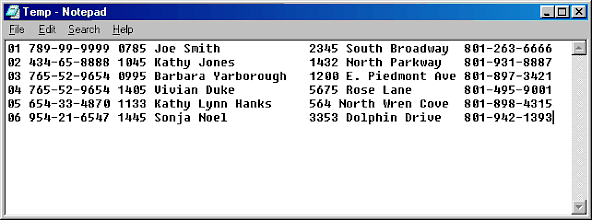
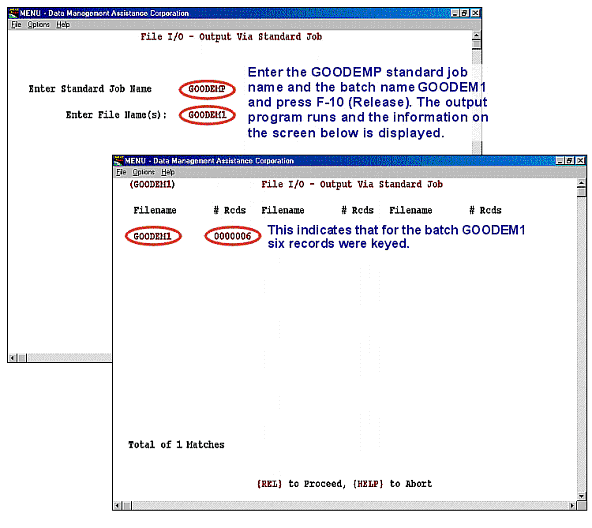
This batch has been output to a text file named, “temp” in the directory, C:unibasetmp.
Output Screen 14
The output text file could be viewed by shelling out to a command prompt from Unibase, going to the directory C:unibasetmp and entering “type temp.” Here we have simply opened the file for viewing in Windows Notepad.
This completes a simple job from form design to output. In review, you have learned how to:
- Design a form for data entry
- Define field attributes
- Set up a standard
- Generate an output program
- Generate output
A trained operator could complete all of the above tasks, except data entry, in about half an hour. Unibase by DMAC is capable of extraordinarily complex processing, but even the most demanding jobs can be set up quickly. DMAC provides extensive training and support in Unibase by DMAC basics, Advanced Use of The AID Language, Unibase Imaging and WebBase.
