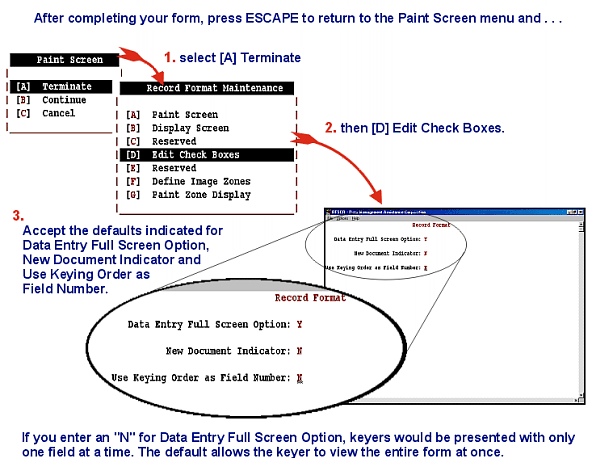
Although this presentation is in the form of a tutorial, it is not interactive. Do not attempt to follow the keying instructions that are given. Navigation within the presentation is possible only with the navigation bar at the bottom of each page.
Defining Field Attributes Screen 1
Defining Field Attributes Screen 2
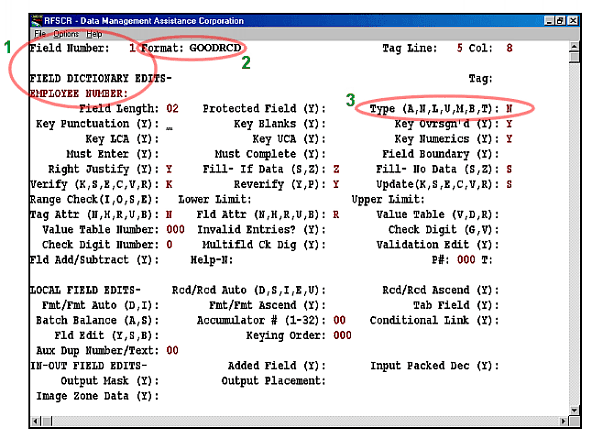
4. Now we see the Check Box Edit screen with the second field, “Employee Number” displayed. (No field size is specified for the first field, “EMPLOYEE RECORD. ” It is simply an identifying tag, not a field, and would have a Field Number of zero.)
The Check Box Edit screen lists field attributes and field edit options. You can specify as many as 51 field attributes and field edit options for each field in your record format.
These Check Box Edits are divided into three groups:
- Field Dictionary Edits
- Local Field Edits
- In-Out Field Edits
For a complete list of option definitions for the Check Box Edit screen, click here.
5. Change Field Type settings:
- This is field number 1, EMPLOYEE NUMBER.
- The record format being edited is GOODRCD. A job could have many record formats.
- The field type specified for this field is “N”, for numeric. The default for field type is “L”, for capital alpha, numeric and punctuation characters only.
Defining Field Attributes Screen 3
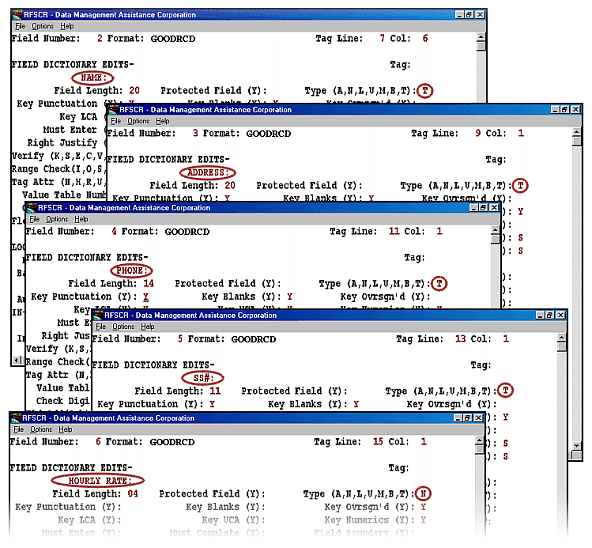
Advancing through each successive screen, adjust Type appropriately for each field.
- NAME : = T (all the characters found on the standard PC keyboard)
- ADDRESS : = T
- PHONE : = T
- SS# : = T
- HOURLY RATE : = N
Once field attributes have been defined, the next step is to set up a standard job. To begin this process, press F10 after the last field has been defined and Escape until you arrive at the File Definition menu.